Deep Search.
This is my entire photography editing process. If you’re reading this, it means you care about what I’m doing enough to stop and take a closer look. You might even check in on my work from time to time – possibly even read new stories on here when they come out. In this busy online environment, that means something to me. Sharing this information is my way of giving something back.
I’ve taken everything I do and organized it into one system. I distilled all of my editing techniques into a collection of presets for Lightroom and Camera Raw. I did this to streamline my workflow and standardize the look I apply to photos in post processing. I’ve looked for something like this for years. I never found it. So I built it.
Below is a 1-hour video tutorial and a full written editing guide. My presets are available in the store if you want them. These are the actual presets I designed for myself and use every day in my line of work as a full time photographer. The only thing I changed to make my system accessible to others is organize it and give it a name. Deep Search is a nod to my favorite movie, btw. Look it up, and thank me later. There’s a little easter egg at the bottom of the page.
While I can’t promise my editing style will immediately align with your personal taste, I can say one thing for sure. This is the exact editing process I use for all of my work – it encompasses everything I need to complete the creative vision behind every project. The presets I designed are the only ones that have ever really worked for me. They work because they weren’t made to sell. I made them because I needed them. I’ve only made them available in case people want to learn from them or apply my editing techniques to their own process. If our styles are anything alike, and you take the time to learn them, they will work for you. I’ve worked hard on this. It was a beast of a project. The outcome is something more than I imagined, and it’s revitalized my editing experience. I hope this workflow brings as much value to your editing process as it has to mine.
Presets are available HERE if you want them.
Written Guide
Some quick context before you dive in… My perspective on photography was shaped in large part by the golden era of photojournalism and the film processes I learned on. Kodak Portra, Fuji Superia, Tri-X and Kodachrome have all been significant influences throughout my work. These film stocks, my personal style and a bit of minimalism all shape the aesthetic territory covered throughout this workflow. Every stylistic choice I make is done in pursuit of timeless, classic aesthetics in photography.
Step 1: Basics
• In my workflow, the three most important photo adjustments are Exposure, White Balance and Contrast. These parameters need to be set ahead of applying presets. If you master these three things, you will have everything you need to produce excellent edits.
1. Open a photo in Lightroom or Camera RAW.
2. Set the Exposure. When in doubt, proper exposure is typically considered to be the point at which the most natural contrast is apparent in a photo. It’s the optimal balance between highlights and shadows.
3. Set White Balance. When using presets, start by prioritizing the balance between warm and cool tones within the image. This will prepare the photo for presets. Personal taste can be fine-tuned after the preset has been applied.
4. Set the Contrast (optional). Your preset choice will change the contrast value. I set the contrast before applying a preset in order to pre-visualize the look I’m going for. Pre-visualizing the contrast helps inform the process of selecting a preset.
Step 2: Apply Preset
• Not all photos need the full effect of a preset. It’s important to recognize when extra editing does more harm than good. For photos that don’t need much work, but could still benefit from a little extra style, try selecting a preset and adjusting the Amount slider to somewhere between 30% and 40%.
• Uncommon tip: once you’ve selected a preset, there are two ways to adapt it to your photo. The difference is important. If you like the general look of a preset, but it lands a little too harsh, just reduce the contrast. Remember, the Basics panel (especially contrast) is for fine-tuning the preset to the image. This is where we reduce any perceived harshness introduced by a preset. The Amount slider is for style intensity only. 100% usually works for me, but it’s not uncommon for me to run them as low as 30% or as high as 150%. These presets can handle it.
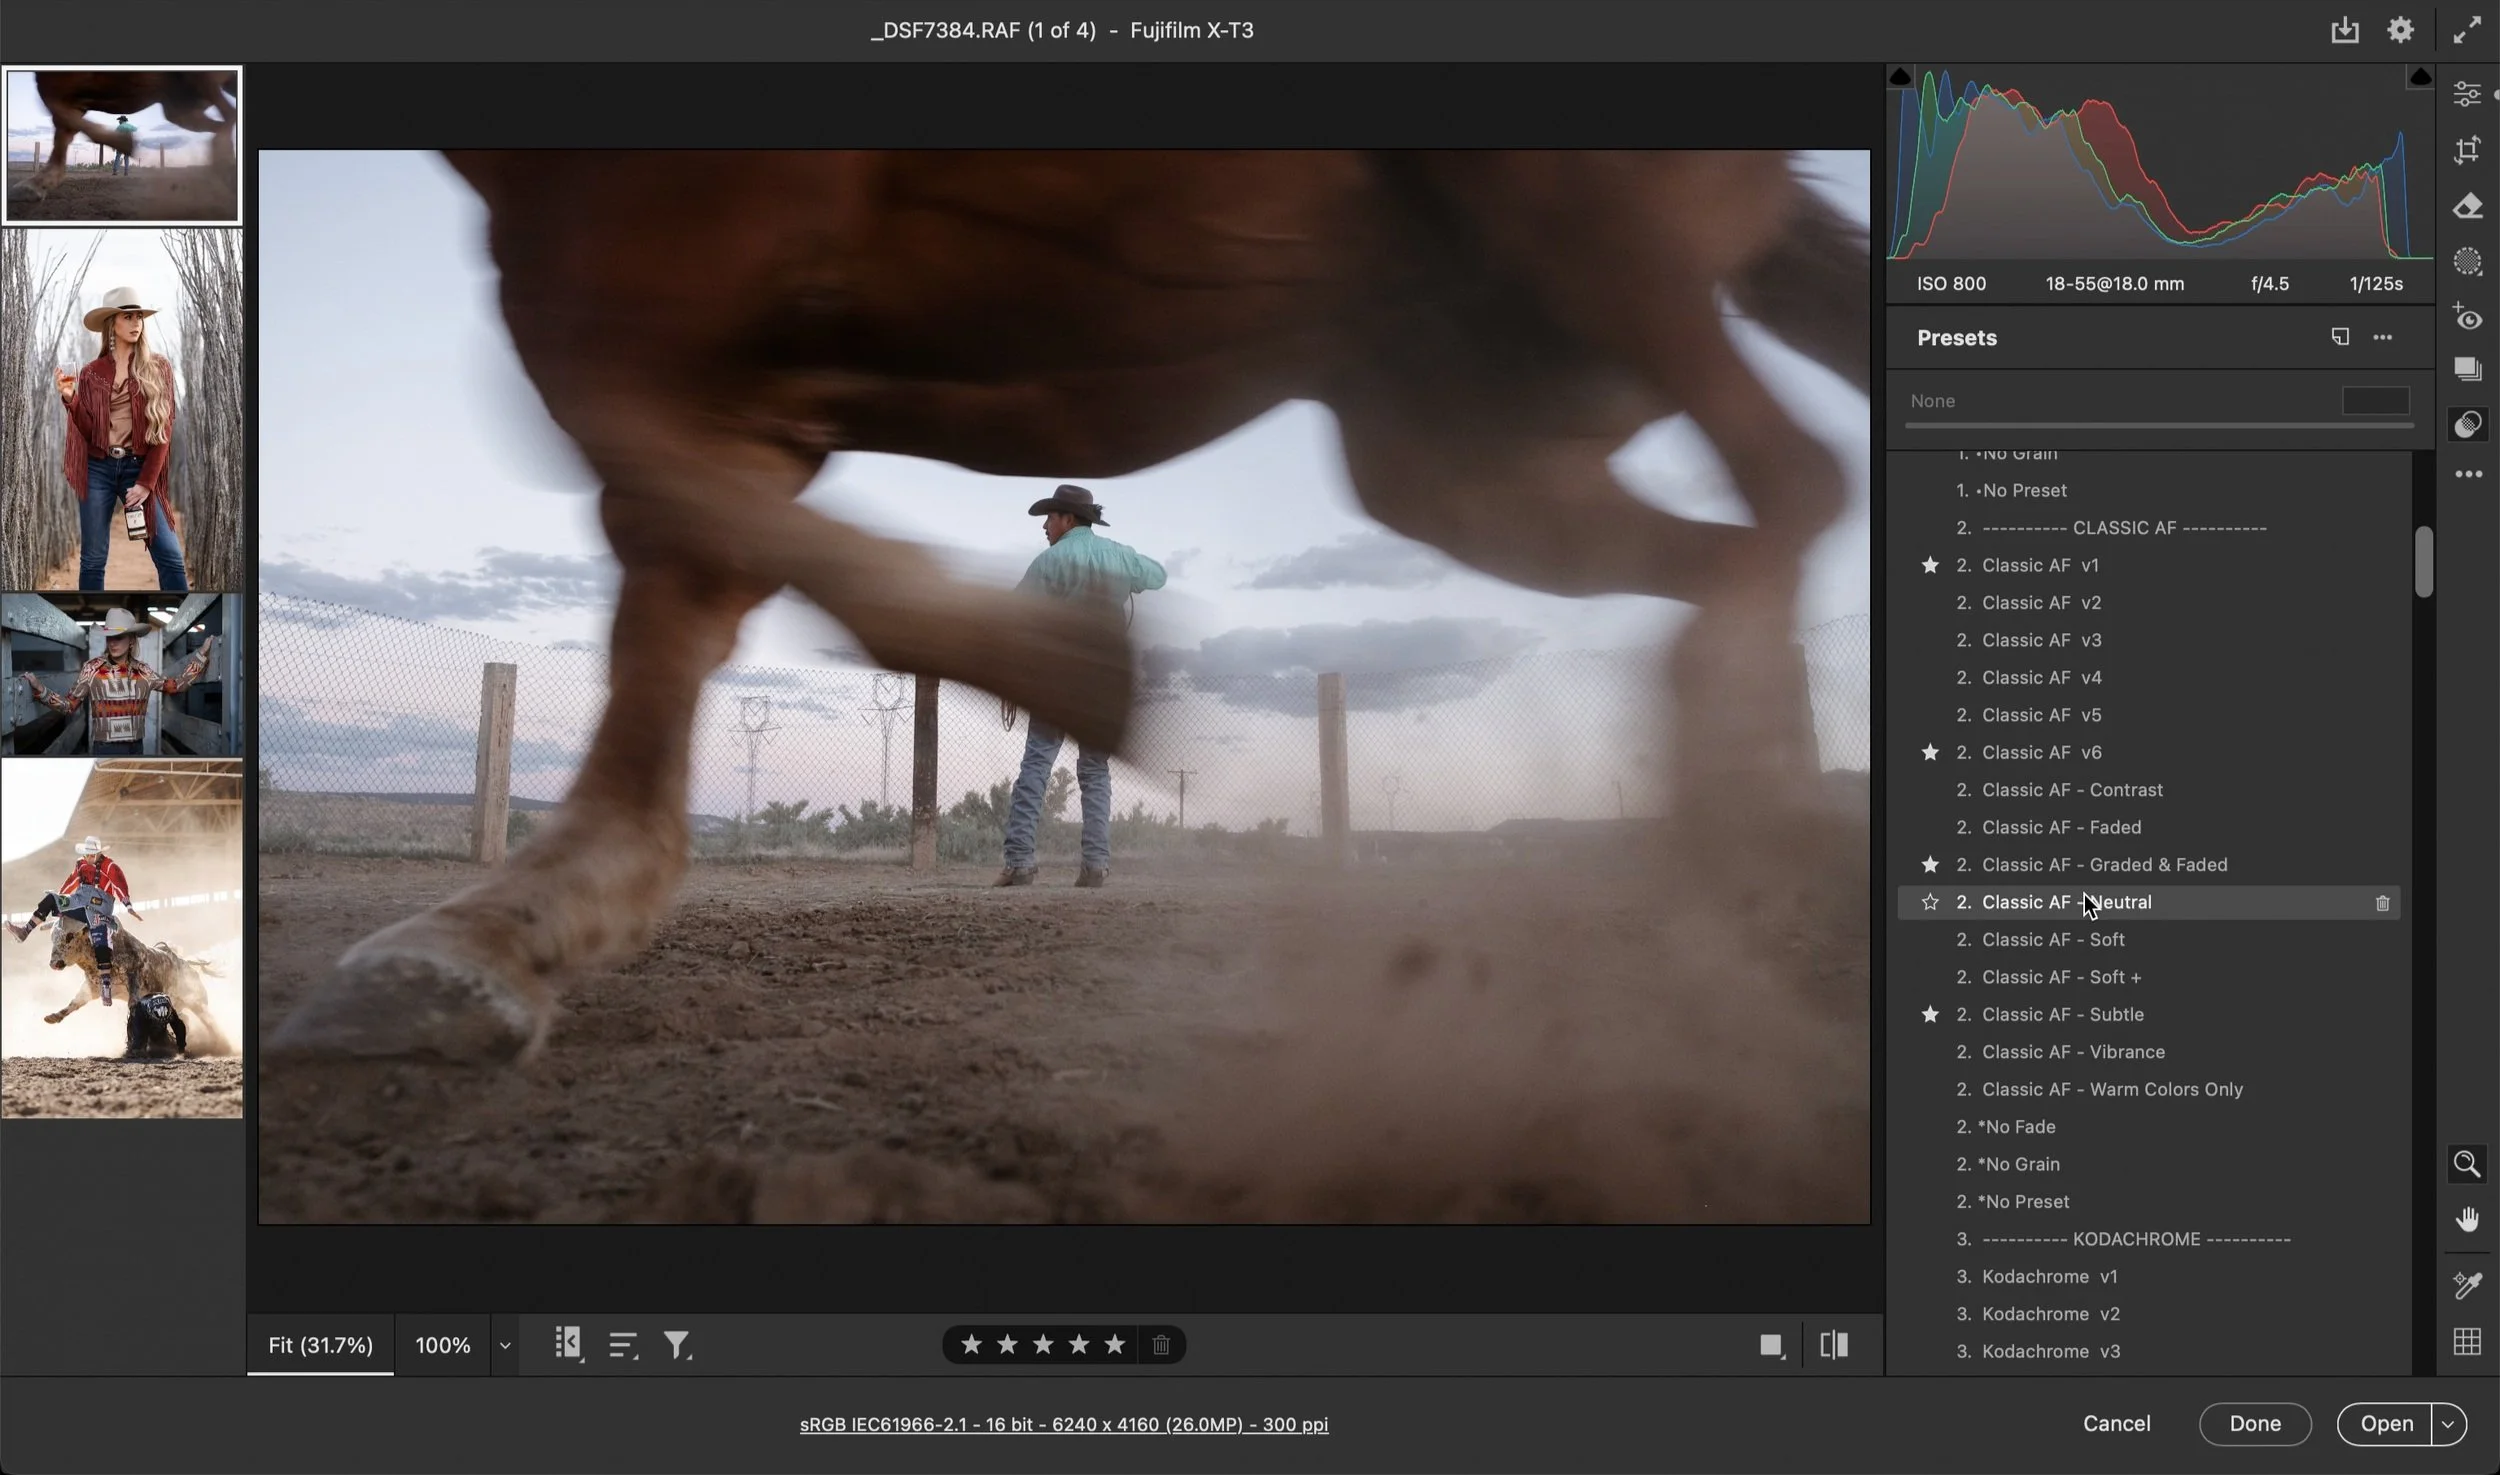
1. Open the Presets Panel.
2. The key to this workflow is to Hover over the presets to engage a preview, then slowly Scan down the list until you find a preset that pairs well with your photo.
3. Apply preset.
4. Adjust the Amount Slider to increase or decrease the style.
5. Each preset category has an option for No Grain, No Fade, and No Preset. Use these now to remove any unwanted fading or grain. The No Preset option allows you to reset the preset without affecting the exposure and white balance. You can also hover over this feature to see what your photo looks like with no preset applied for a quick before & after view.
Step 3: Fine Tune
1. Return to the basics panel. Fine Tune your Exposure, White Balance, Contrast and Saturation to adapt the preset to the photo. This step is essential.
2. Lower contrast to reduce harshness. Raise contrast to improve flat tonality.
4. Lower Saturation only if the overall colors are too intense. Individual colors are addressed in Step 4.
5. Adjust Highlights and Shadows to recover overly dark or bright areas. If you choose to adjust the black and/or white point, subtlety is important.
Step 4: HSL / Color Management
1. Each preset applies HSL adjustments. This is where much of my editing style begins to takes shape. In this section, individual color adjustments can be fine tuned if further color management is needed.
2. Digital photographs typically oversaturate blues and yellows. Especially blues. I often lower the blue and/or yellow saturation. This can be an easy way to clean up the color palette.
3. Decreasing blue saturation can create an unnatural appearance on skies and other large blue surfaces. In some cases, slightly increasing the blue Luminance can make this adjustment appear more natural.
4. If skin tone appears too yellow or orange, lower the orange saturation carefully until the skin tone appears more natural. If this isn’t enough, try carefully adjusting the red hue slider to the left (toward magenta).
5. If skin tone appears too red, move the red hue slider to the right (toward orange) and/or try decreasing the red saturation slightly.
6. Green and yellow tend to overlap too much in digital photos. Experiment with lowering the yellow saturation more. Also try very slightly adjusting green hue to the right (toward teal) and lowering the green saturation to taste.
Step 5: Grain & Effects
1. I usually reduce the Clarity slider between -5 and -10 to make hard digital edges appear slightly more natural. Anything beyond -12 or -15 can introduce a glowing effect. I try to avoid this.
2. Some photos look more digital than others. IDK why. If I apply grain, I do it to soften this appearance and add some style. Remember, grain size affects the resolution of your photo. Grain amount does not. I prefer large grain. It looks more natural to me, but it can affect sharpness. For commercial work, I usually apply the No Grain option unless a client specifically requests a style that calls for it. To fine-tune the grain of any preset, select a new grain option from the Toolbox and use the Amount slider at the top of the preset panel.
3. If workload and time constraints allow, I prefer to apply film grain overlays in Photoshop instead of using Lightroom grain.
Step 6: Edit in Photoshop
• I only use photoshop for special tools like film grain overlays or to retouch high end commercial work.
1. New Layer. Once you’ve opened an image in Photoshop, immediately duplicate the base layer by holding Command and pressing J. Do this to avoid making changes to the base layer.
2. Sharpen. Lightroom automatically adds a small amount of sharpening. I almost never add more. If I do, I prefer Unsharp Mask. Use it sparingly. If I sharpen, I always do it before applying overlays to avoid sharpening grain textures. Film grain hides digital sharpening. Don’t sharpen grain.
3. Film Warmth. In some cases, I will apply a film-based effect called Global Halation. Often attributed as the “warmth” of film. To apply this, select Solid Color from the adjustment layer menu. Enter a value of FF9B5E into the Hex Code. Next, select Soft Light as the blend mode. Reduce the opacity of the adjustment layer to 5%. If the color needs to be more orange or red to pair well with the photo, simply double click the color swatch on the adjustment layer. This will reopen the Solid Color adjustment. The value slider can be moved up or down to fine tune the hue.
4. Film Grain Overlays. This is the primary reason I open photos in Photoshop. I use film grain overlays because they are made from real grain scanned from real film. It looks significantly more realistic than Lightroom grain and brings an organic texture to digital photographs.
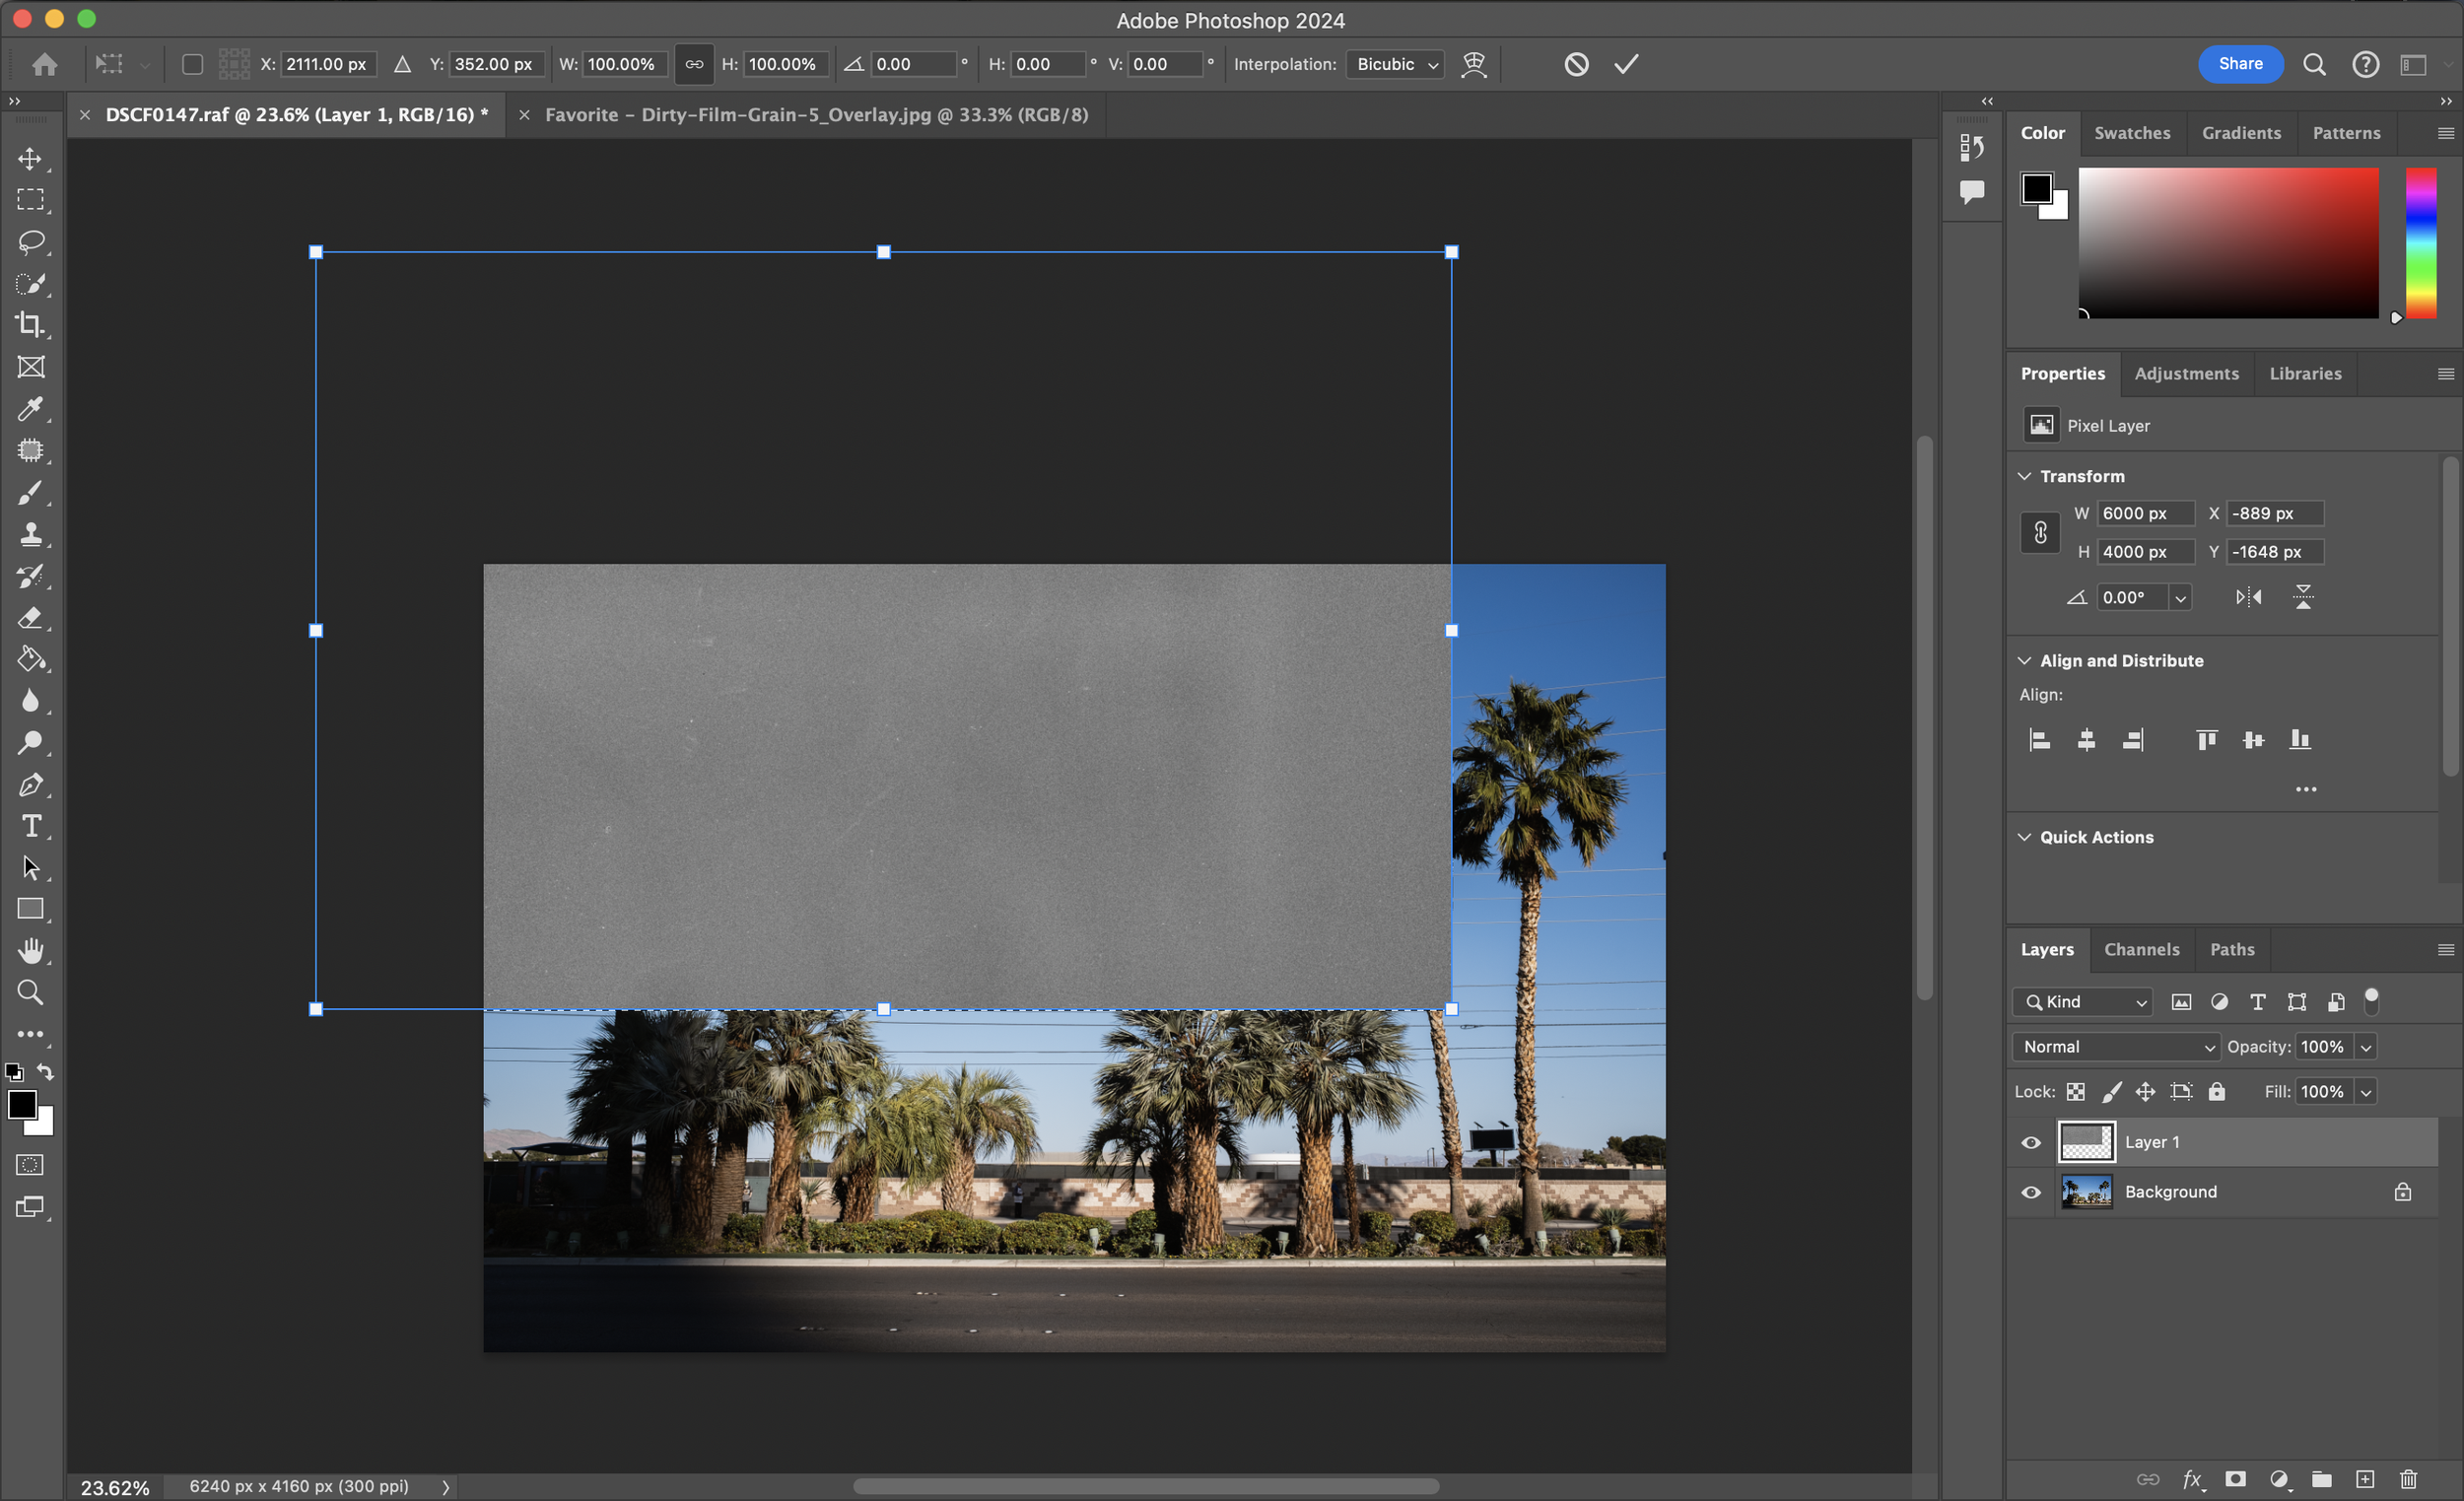
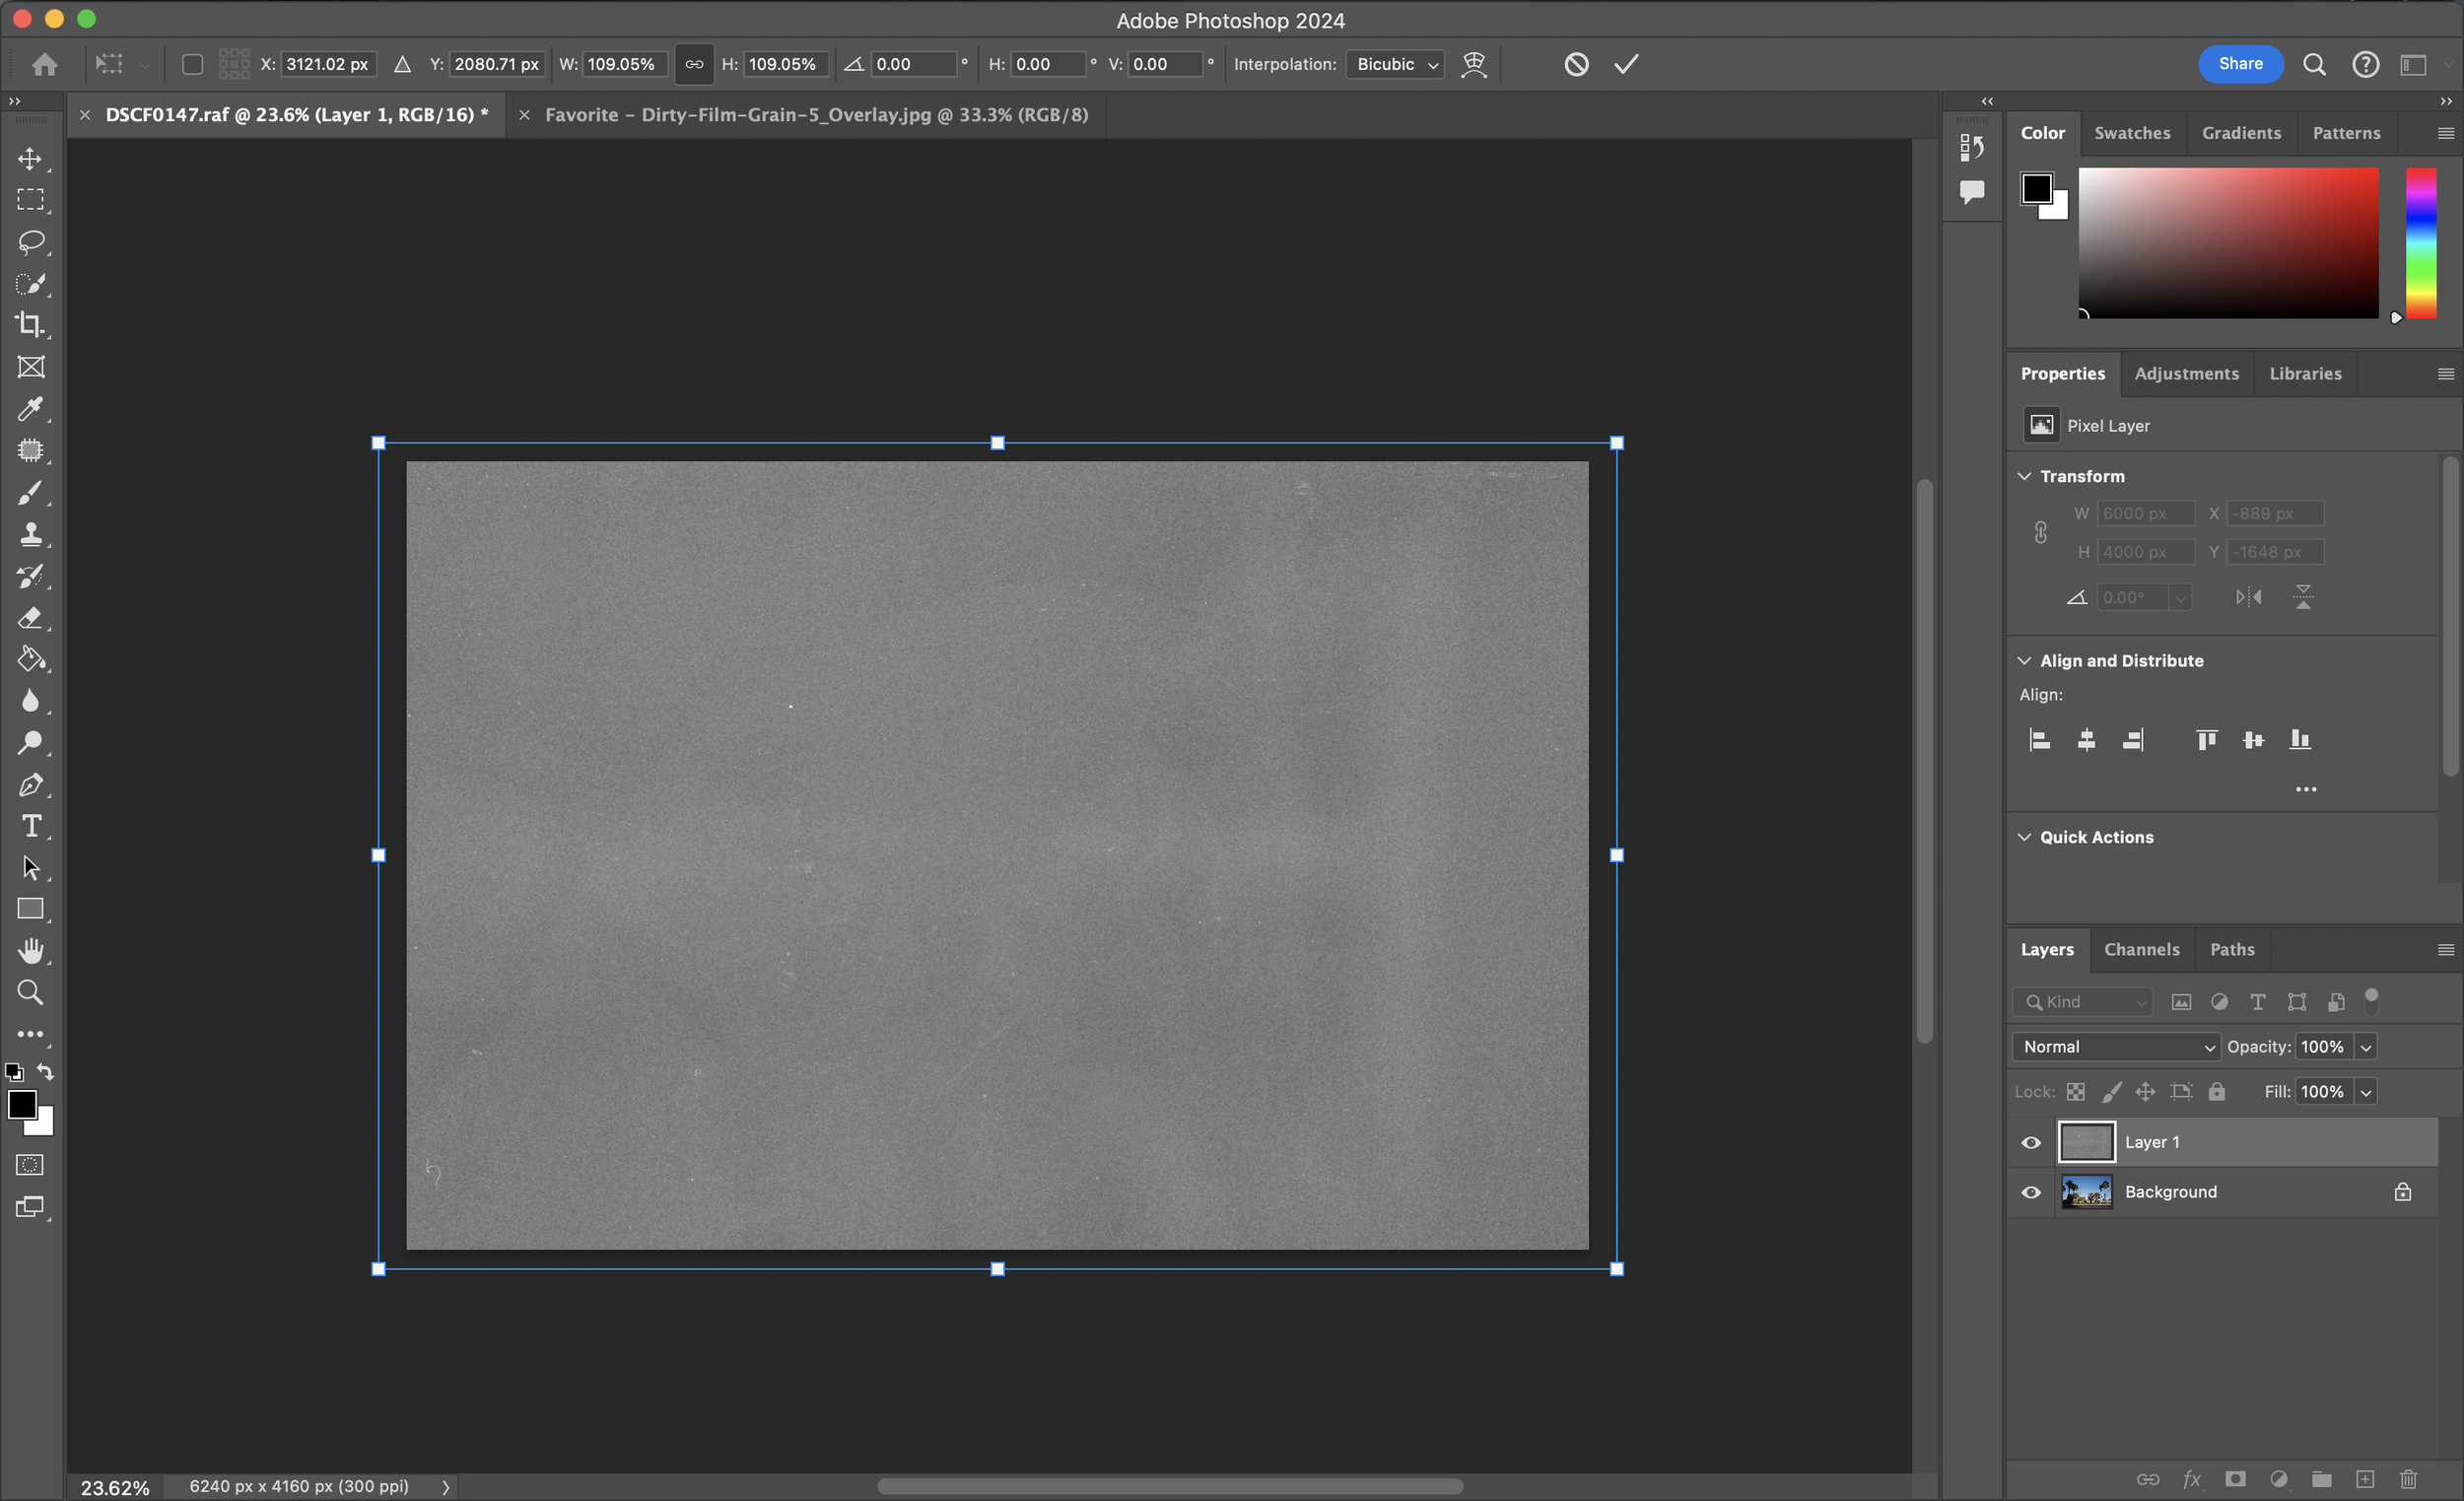
Find the film grain overlays included in the Deep Search workflow package. Open an overlay in photoshop. Once opened, copy & paste it onto your photo. Set the blend mode to Overlay. Use the Opacity slider to fine tune the grain to your personal taste. Anything below 95% looks more realistic. See the demo video for instructions on how to rotate and resize the overlay to fit your photo.
The end.


